ARCHOSC-HTML-CSS-JavaScript
HTML, CSS and JavaScript Basics
Section 1
Part 1: Create a new folder in your local workspace and pull your GitHub repository down into it using the command line.
Part 2: Create a working document folder for this session, then screenshot your downloaded repository, and explain what you just did.
Having seen some of your portfolios already, I know that some of you have implemented some CSS and Javascript already - this is not an issue, and is actually encouraged!
But, by the end of this lab, you will need to have the following in your portfolio
- CSS in it's own file referenced by HTML
- JavaScript in it's own file referenced by HTML
- References to either IDs or Classes in CSS
- References to either IDs or Classes in JavaScript
- A NavBar/other navigation system that allows you view the individual labs
- A "Dark Mode" toggle that allows you to toggle Dark Mode on your main page, bonus points if its available site wide
If you have all of these then all you need to do for ths lab is screenshot them in your code (and working on your website) and explain what they do in your portfolio.
Any missing sections can be included by completing their specfic section.
To this point, your repository probably looks something similar to the image below:
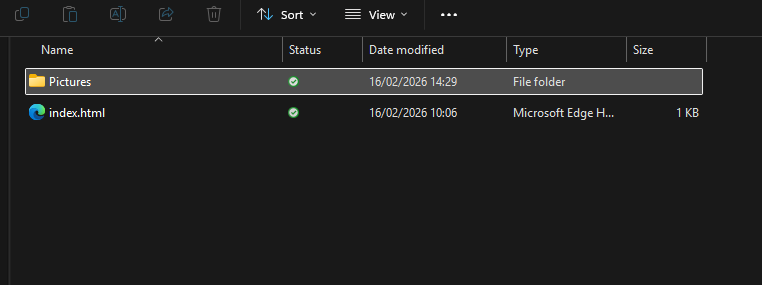
The first thing you need to do is add a CSS and Javascript folder into your project.
In Visual Studio Code, click file -> new text file.
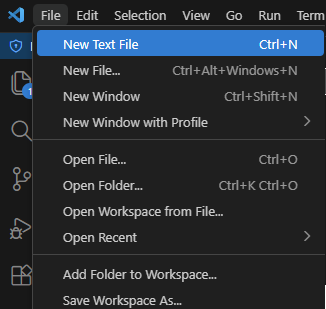
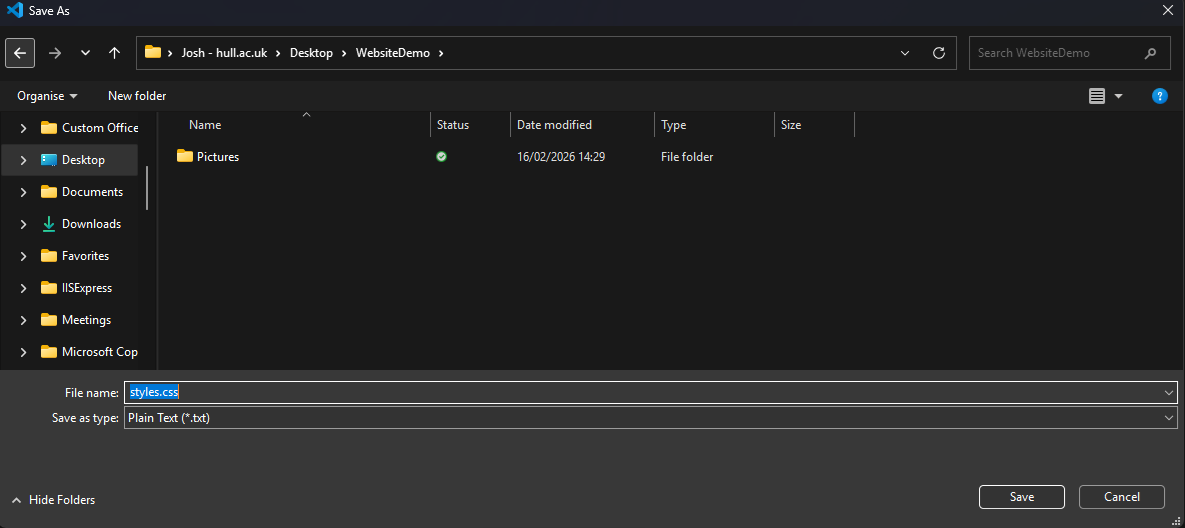
In the created file, click file -> save as and name your file styles.css, saving it in the same folder as your index.html file.
When saved, your local repository folder should look like this:
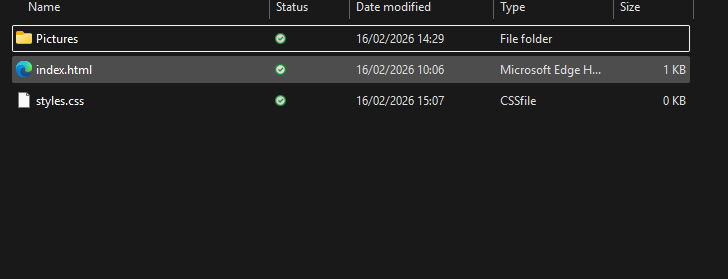
When done, screenshot your local repository and save that to your pictures, explaining what you did in your working document.
You now need to reference your CSS and JavaScript in your HTML itself, to do this you need to add the lines:
<link rel="stylesheet" href="styles.css">
to the header of your HTML document
and
<script src="script.js"></script>
to the bottom of the body section of your HTML document.
This means that your HTML will now be able to talk to both your CSS and JavaScript documents.
Screenshot your CSS and JavaScript links and add them to your pictures folder, you should explain what they are and why you need them in your working document.
Now you have one HTML file working with your CSS and JavaScript we now need to add HTML pages for each of the labs you have completed so far.
Create a new text file in Visual Studio Code, as you did previously. And this time, copy the following into the document:
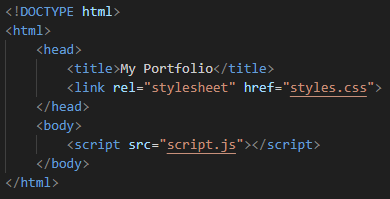
When you are done, save your HTML document, I am going to call it “GitHub1.html” but you can call it whatever will help you remember!
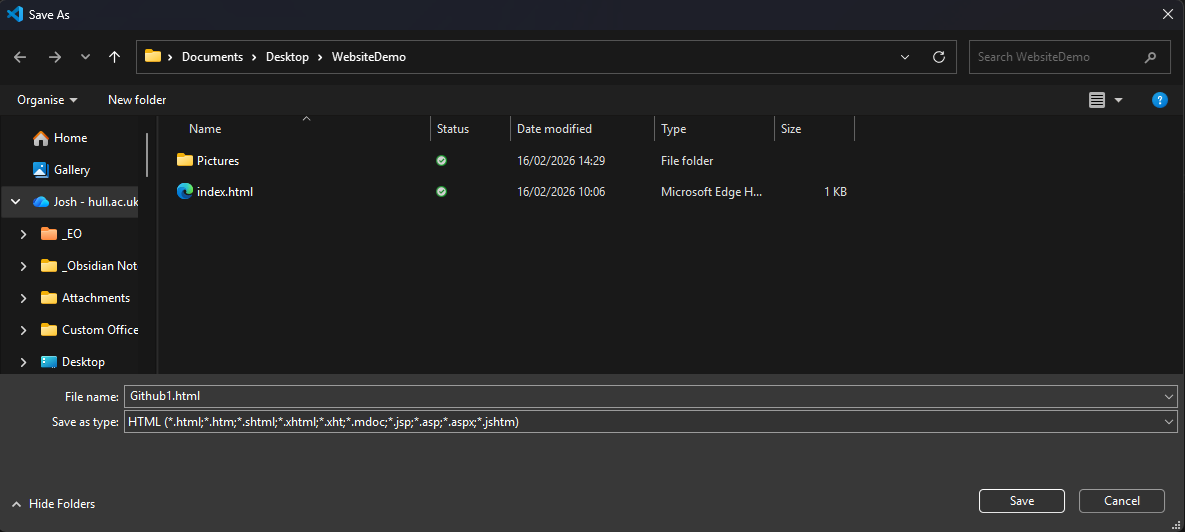
Repeat this process to create two more pages for last weeks lab, and this one - including the same HTML template!
Add a screenshot of your completed folder structure, including an explaination as to why the different pages are needed when you are done.
Section Two
Open your index.html file, and locate your descriptions of each lab.
Once you have found them copy the information for each lab into their own HTML file
The screenshots and defintions from the first GitHub lab should go into the GitHubOne page, the second GitHubTwo etc.
When you are done your index.html page should be empty, minus the HTML skeleton and references to your HTML and JavaScript, like the image below:
If you are at all unsure about if you have done this properly, please ask myself and a demonstrator to clarify that your labs are in the right place, and your index is empty
Once you have done this, add the following code to your index.html
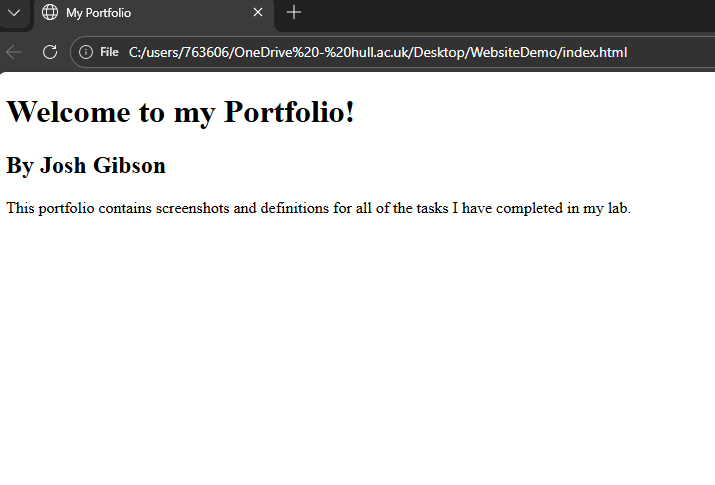
<h1>Welcome to my Portfolio!</h1>
Then add the following Underneath
<h2>By [Your Name Here]</h2>
And then, finally,
<p>This portfolio contains screenshots and definitions for all of the tasks I have completed in my lab. </p>
Save your HTML file and open your website, it should look like this:
Now, to add some design to your porfolio.
Open your styles.css file, and make it look like the image below.
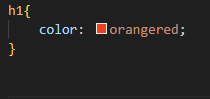
Save everything, and re-open your website. You should see that your heading is now Orange.
Screenshot your CSS and website with the orangee text and add them to your pictures folder, you should explain what the CSS is doing they are and why you need it in your working document.
Now we are able to change items by their tag, the next step is to change items based on their class. This will allow us to change individual elements, without changing an entire page.
To do this we must first assign some of our HTML a class to begin with.
Go back to your index.html folder and change.
<h2>By [Your Name Here]</h2>
to
<h2 class="name">By [Your Name Here]</h2>
and
<p>This portfolio contains screenshots and definitions for all of the tasks I have completed in my lab. </p>
to
<p class="description">This portfolio contains screenshots and definitions for all of the tasks I have completed in my lab. </p>
When done your index.html file should look similar to this (obviously with your name - not mine!)
Then return to your CSS file, and add the following:
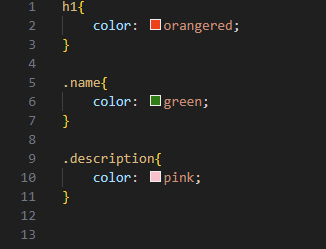
Save everything and refresh your web page.
Your text should now be orange, green and pink!
Screenshot your changed CSS and website with the multi-coloured text and add them to your pictures folder, you should explain what the CSS is doing they are and why is useful to be able to make references to HTML elements by their class.
Now, we also want to be able to access our classes from within our JavaScript.
Open your JavaScript document and add this line
const myName = document.querySelector(".name");
You should then add another variable below, that gets access to your “description” class.
Underneath this add the following lines.
console.log(myName);
console.log(THE NAME OF YOUR DESCRIPTION VARIABLE);
This will allow us to check and see if your classes are being picked up correctly.
Save everything, and open your website in the browser. Nothing should have changed.
Press F12 on your keyboard to open the developer console. If you are using Edge you may get a prompt asking if you want to do so - you are fine to click “Open Dev Tools”
When open it should look like this:
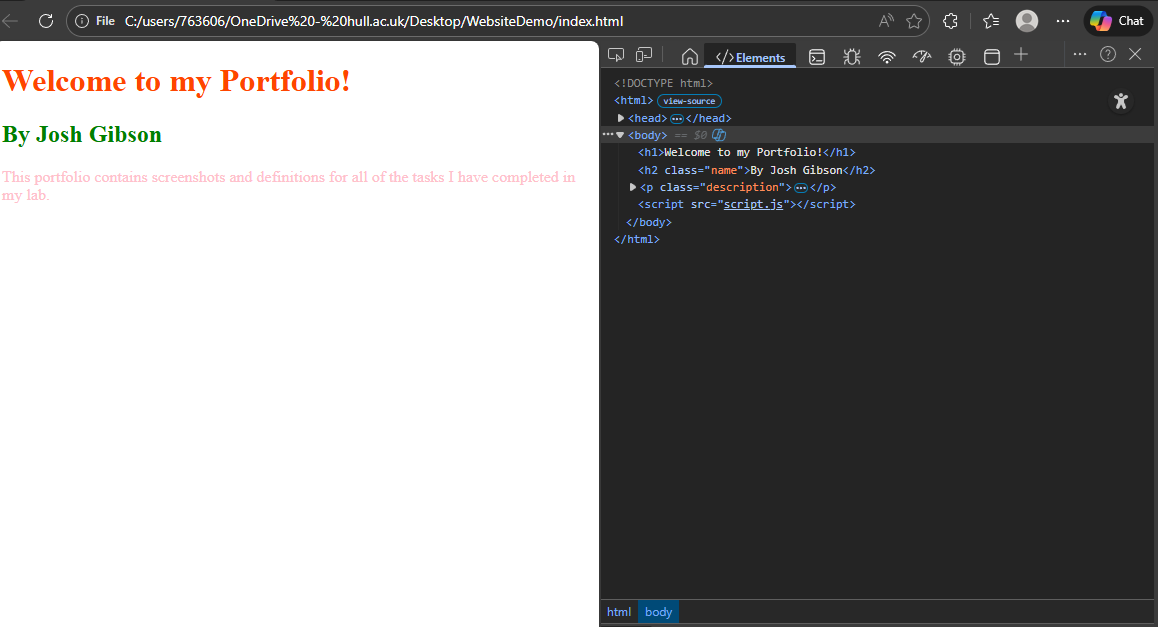
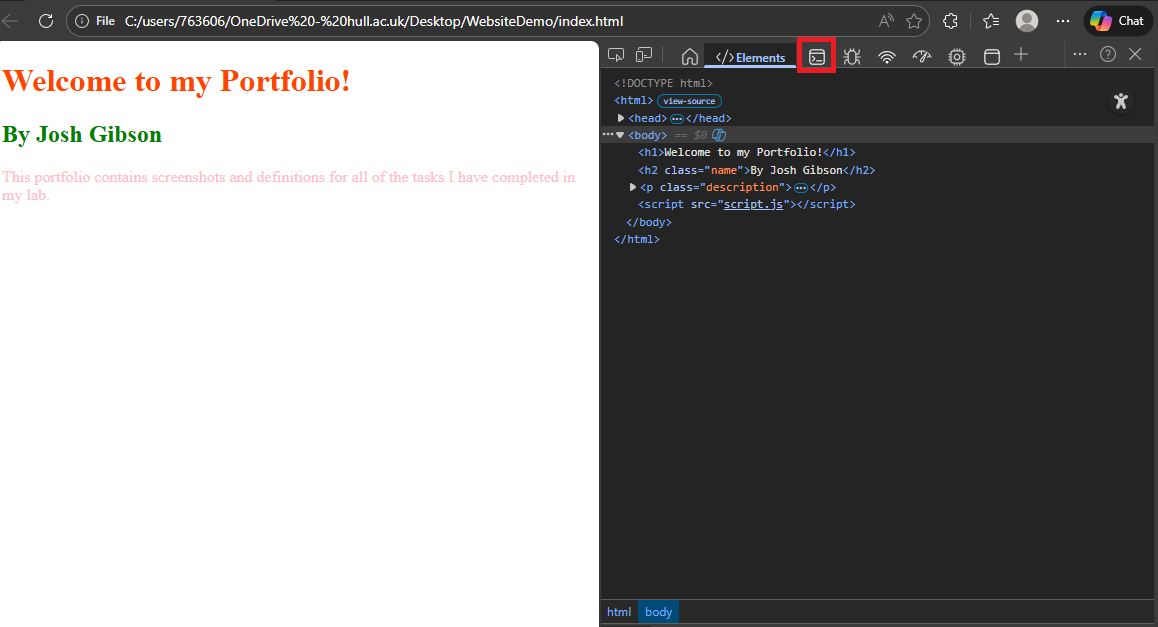
Select the button below, to open the console
Once open, the console should show your two classes, if you can hover over them and they light up correctly on the page you know that your JavaScript is picking them up properly.
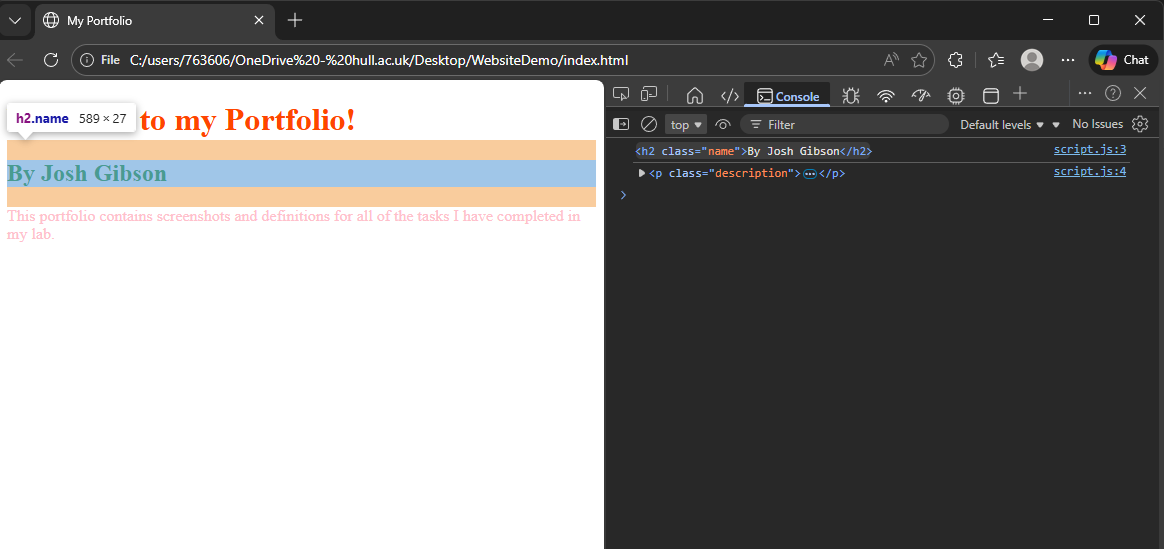
Screenshot your created JavaScript and the Console results in the browser, showing your JavaScript can access your classes correctly.
Section 3
Now you can access, and edit your HTML with CSS and JavaScript, you need a way to access the other pages you created (with all of your work in!)
We’re going to start with the easiest way of doing this, a list of links to the other pages.
Add the following code to your index.html file.
<h4>Pages</h4>
<ol>
    <li>><a href="GitHub1.html">GitHub Lab 1</li>
    <li>><a href="WriteTheNameYouGaveTheLabeHere.html">Named Lab 2</li>
    <li>><a href="WriteTheNameYouGaveTheLabeHere.html">Named Lab 3</li>
</ol>
Save your HTML file with the pages added, and open your website in the browser, it should look like the image below (my GitHub Lab 1 is only purple becuase I checked it’s working):
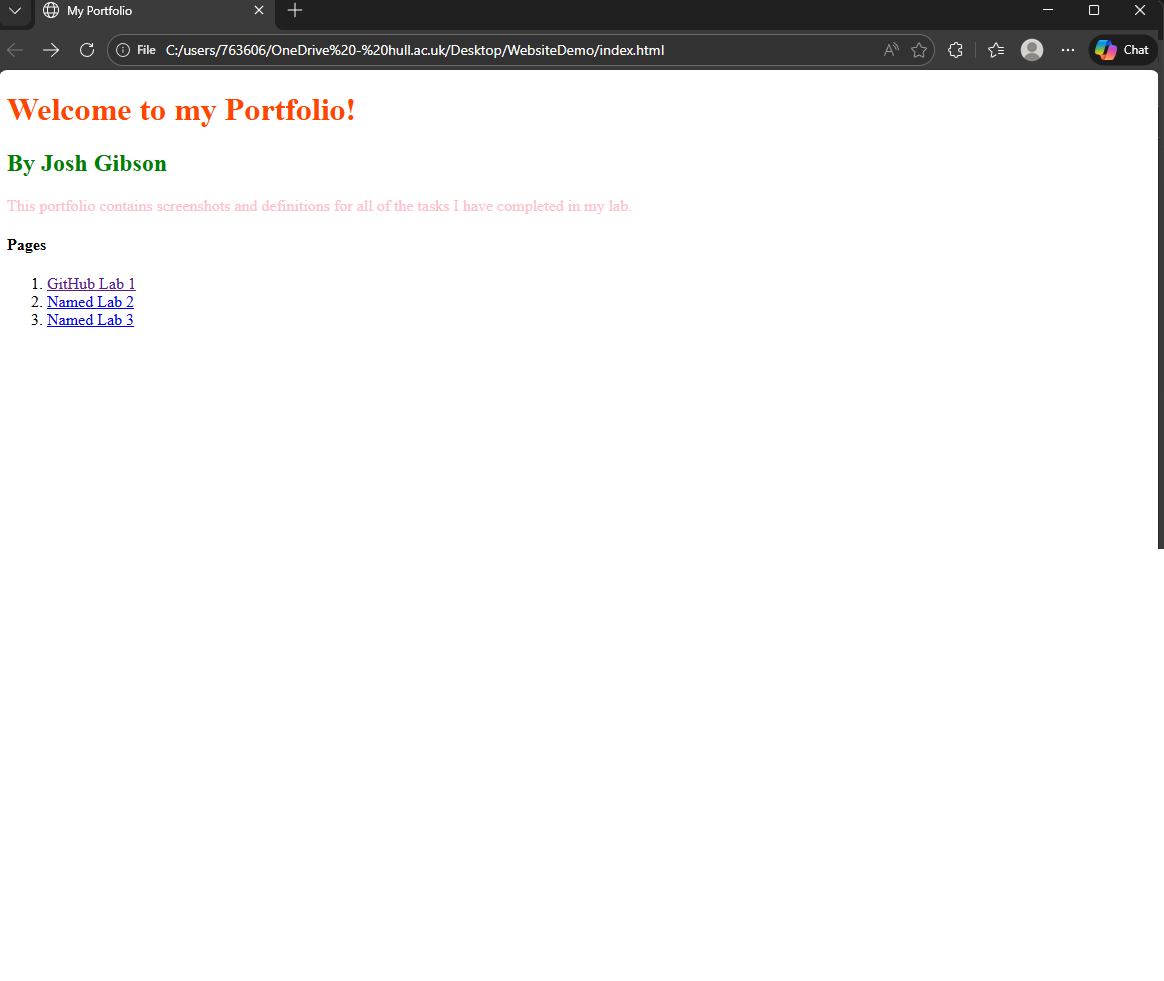
With this, you have the foundations of Website Navigation, and it works! But to complete your Portfolio you should aim to implement a proper Nav Bar.
Turn your list of links into a Nav Bar
If you are struggling with how to do this I have included some resources that could help below
Top Nav Bars Responsive Side BarsWhen you have completed the above task, create screenshots of your NavBar HTML and the Navbar visbile in your web page, alongside a description of how you implemented it.
Section 4
The final aspect of your portfolio you are going to work on today is implementing a Dark Mode on to your website.
To create a working Dark Mode for your portfolio you will need to do several things
- Create a button for your website that you can toggle for Dark Mode
- Add customised CSS classes for the Dark Mode portfolio colours
- Create a reference to your button in JavaScript
- Create a listener for your button being pressed in Javascript
- Toggle the different CSS on and off when the button is pressed.
Most of the information you need to do this is available in the lecture slides - but you will need to figure out how to make the entire website body match the background colour of your text.
Extra kudos if you can alter your button using CSS, and get it to work alongside your Nav Bar - and make your Dark Mode consistent when changing pages.
When you have implemented Dark Mode, screenshot your final website in both its Light and Dark modes, alongisde screenshots of all of the relevent pieces of HTML CSS and Javascript code, explaining how you did it.
Ensure your portfolio is up to date with the information from todays lab, then push it back to GitHub.
That's the end of this weeks lab - well done!